1 Introduction
Virbox Protector Standalone support to protect the Java applications, include Jar, War archives and class file and related data resource.
Virbox Protector Standalone support to protect Java application (Jar, War, or Java SDK both in GUI and CLI mode, here we use Virbox Protector Standalone GUI tools to show the protection process. and introduce how to deploy the protected Jar/War projects in Windows, Linux and macOS systems.
We use a Jar and War file as a sample to show the whole protection process step by step; and the protection process to War Archive is same. Developer may refer the Jar Protection process to protect War Project for test and evaluation also.
the Operation environment is windows
The version of Virbox Protector GUI tools is 2.4.1 trial edition.
For trial license apply, install the Virbox Protector into your desktop, please refer the guide in Virbox website.
https://appsecurity.virbox.com/
https://lm-global.virbox.com/detail/virboxProtector.html
For technical support, you can contact us via email:
or via Skype:
2 Protection Mechanism
Virbox Protector supports developer to protect Java project with 2 kinds of protection mode, Java VME and Java BCE (2 different kind of Virbox Protector license required)
With Java VME protection, Developer protect and encrypt the Java's method with Virtualization, all of bytecode executed in the JVM will be convert into the instructions executed in private VM, and provides most secured environment for execution and effective to defend the retrieving and cracking by latest decompiler available in the market. Java VME is suitable for the developer who require to protect their IP/code with highly security.
With Java BCE protection, Developer protect and encrypt the bytecode of each method of Java class file, the bytecode will be only decrypted in execution; the execution and decryption rely on relevant java agent.
3 Main Steps
Drag the Whole folder of Jar/War projects located into the Virbox Protector GUI;
Select The Jar file to be protected in the "Java Files" tab;
Set output path in the "Protection Option" tab;
Complete to Protect the Java Project.
Backup the original file, rename the protected file to original file name and complete the protection process;
Deployment and execution
4 Protection Process
4.1 Input Jar/War file:
Drag Jar/War folder into Virbox Protector.
Tips: The difference to use Virbox Protector BCE mode and VME mode in Operation is: With BCE mode, Drag whole folder of Jar Project into Virbox Protector. For VME mode, drag the Jar project to Virbox Protector, not drag whole folder.
Open the Virbox protector and login to your account, drag the whole folder of Jar or War Project located into the Virbox Protector, in the sample case, the Jar Folder name is "Jar Folder", the Jar file we used is: demo-0.0.1-Snapshot.jar; as shown as the snapshot below:
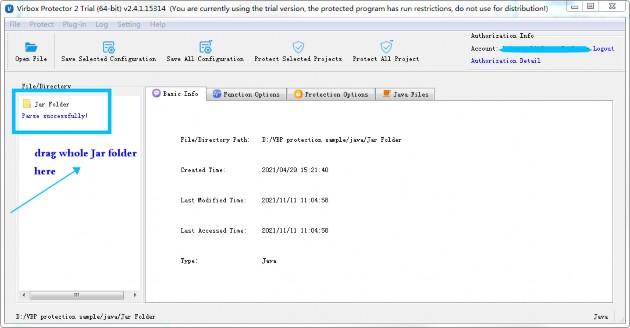
Then Virbox protector will parse the Jar folder automatically. and show related information in the "Basic info" tabs, shown as snapshot above.
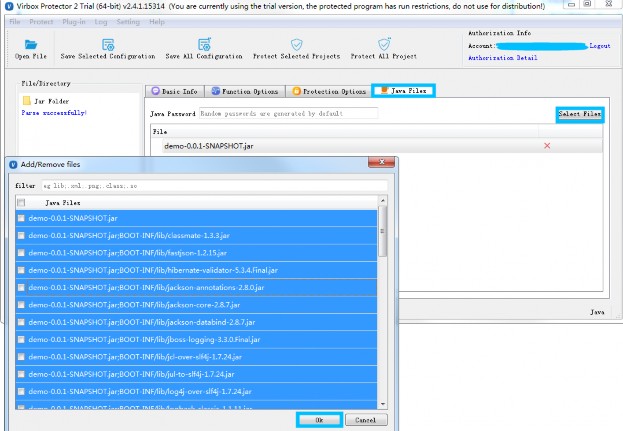
4.2 Selected and Protect the Java file via "Java Files" tabs:
Go to "Java Files"tabs,
Developer may Select those Jar/War file via Jar Files and set output path in protection Option tabs, for those Java files which need to be protected, Click "Select Files "Button", and use Ctrl+A to select all Jar file (execution performance may impact if you select all of Jar file to be protected), then click OK button on the bottom to complete selection and protection setting.
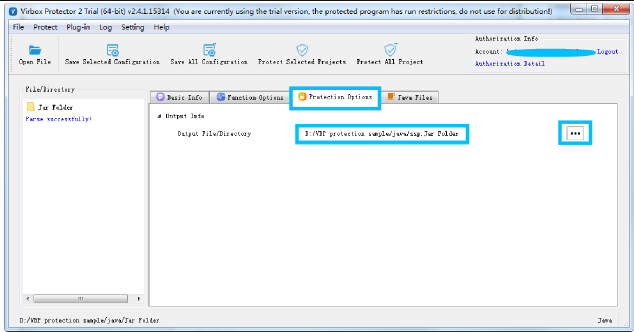
4.3 Set output path in the "Protection Option" tab;
Go to "Protection Option" tabs, set the output path, click the button (blue box on the right) to change sub directory.
4.4 Complete the protection
Click "Protect selected Project" to start protection; as shown as below:
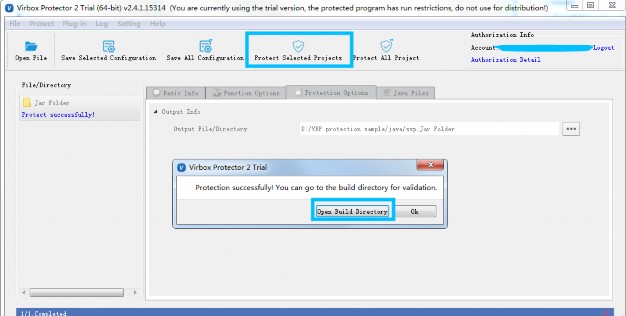
Then go to the output folder, you will find a news file and new folder has been generated, in the sample, we have set the output path: D:/VBP protection sample/java
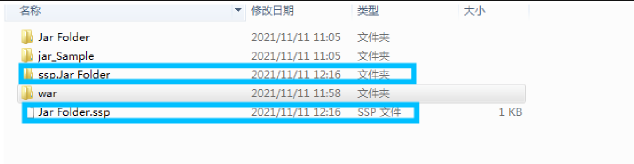
The new file which name "Jar Folder.ssp", is the configuration file which stored the protection option setting.
The new file folder which name "ssp.Jar Folder", is the protected Jar Folder; you can find following files contained in this folder:
demo-0.0.1.SNAPSHOT.jar: Protected Jar project;
sjt_agent.jar: the jar agent file which will be used in future deployment;
readme.txt: a instruction file to deployment.
4.5 Backup and Using protected Jar file to further deployment
Then, don't publish the original Jar file. located in "Jar Folder",
Use the protected Jar project located in the "ssp.Jar Folder" to further deployment testing. It is not necessary to distribute the configuration file: Jar Folder.ssp, to your enduser. please keep it, if you use CLI mode to protect your .NET application, it is useful configuration file when you use Virbox Protector CLI mode later.
In General, With Virbox Protector, with this Quick Guide, Developer may quickly to go through whole protection process to protect Jar application. for more details instruction, developer may take refer from the User Manual-Virbox Protector Standalone, or contact us directly.
The War Project Protection process with BCE mode is same as Jar Project's protection process.
5 Deployment and execution
The deployment of Jar/War Project protected with Java BCE mode is different from the deployment of Jar project with VME protection. the Jar project deployment and execution depends on the Java agent.
5.1 Jar Deployment
5.1.1 Windows Environment
Directly run the protected Jar archive
- If sjt library and the Jar archive are located in the same directly, you can directly run the following command in the current Jar archive directly.
Command:

java -javaagent:sjt_agent.jar-jar ***.jar
- If sjt library and jar archive is not in the same directly, you need to assign the absolute directory.
Command:

java -javaagent:C:\Users\test\Desktop\sjt\sjt_agent.jar -jar ***.jar
5.1.2 Linux System
Directly run the protected program:
- If the sjt library are in the same directory with Jar archive, you can run the following command in the current directory:
Command:

java -javaagent:sjt_agent.jar -jar ***.jar
- If the sjt library is not in the same directory with the jar archive, you need to assign the absolute directory:
Command:

java -javaagent:/home/sense/Desktop/sjt_so/sjt_agent.jar -jar ***.jar
5.1.3 macOS environment
Directly run the protected program:
- If the sjt library are in the same directory with Jar archive, you can run the following command in the current directory;
Command:

java -javaagent:sjt_agent.jar -jar ***.jar
- If the sjt library is not in the same directory with the jar archive, you need to assign the absolute directory:
Command:

java -javaagent:/Users/sense/sjt/sjt_agent.jar -jar ***.jar
5.2 War Deployment
5.2.1 Windows Environment
Use following ways to configure the system environment, you can select one of them:
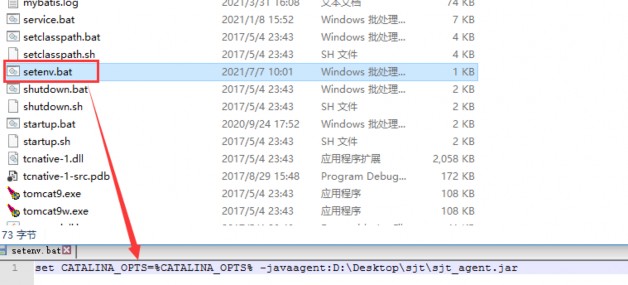
1. Set the setenv.bat in the tomcat\bin directory:
Create the setenv.bat in the tomcat\bin directory, for example:
a) Create “setenv.bat” in the tomcat\bin directory, set the environment variable such as (absolutely path):
set CATALINA_OPTS=%CATALINA_OPTS% -javaagent:sjt_agent.jar
b) Put the encrypted "war archive" into the location: .\apache-tomcat\webapps and start the tomcat service.
- Start the tomcat when system service started
a) First you need to uninstall the tomcat service, use the console command: service.bat uninstall to uninsall tomcat service;

b) Add the sjt_agent.jar in the parameter of JvmOptions in the service.bat, as shown as snapshot below:
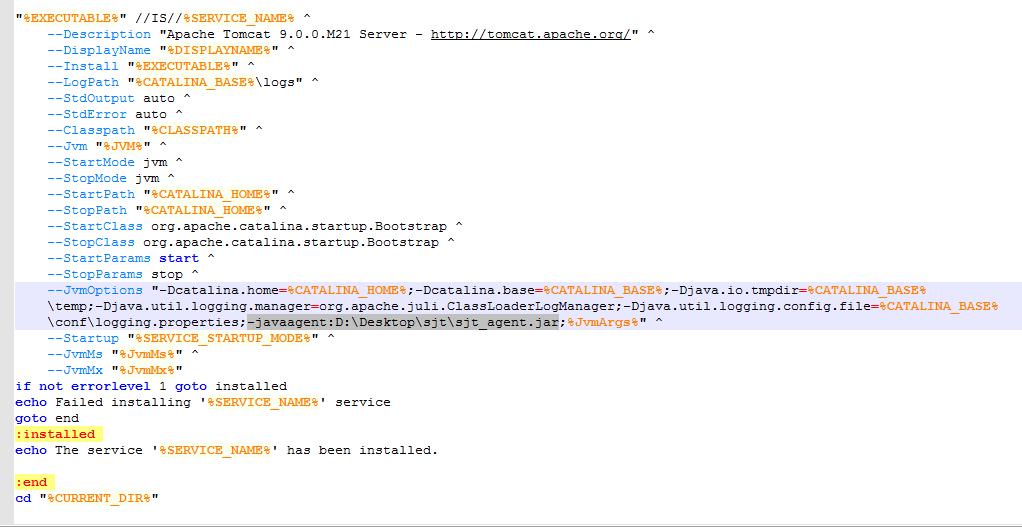
c) Then use the command: service.bat.install in the console windows to install;
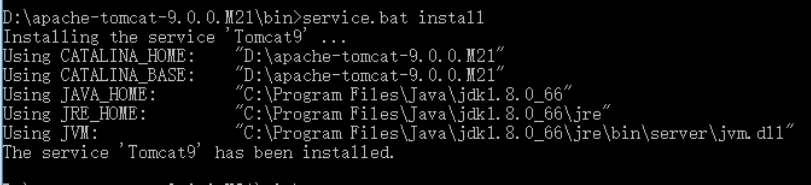
d) then start "tomcat" service in the system service;
e) put the protected "War archive" into the folder of ".**\apache-tomcat\webapps, then start tomcat service.
- Start service when you using tomcat9.exe
a) First step is to start the tomcat9w.exe
b) add the sjt lib in the Java Options list, as shown in the snapshot below:

c) Execute tomcat9.exe to start tomcat service and put the protected war archive into the folder .**\apache-tomcawebapps, then start the tomcat service.
5.2.2 Linux System
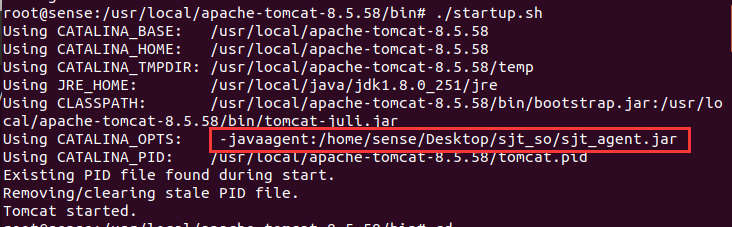
Set Setenv.sh in the tomcat directory:
- Create a new setenv.sh in the tomcat\bin directory, the absolute path environment variable can be set as follows: CATALINA_OPTS="$CATALINA_OPTS -javaagent:sjt_agent.jar
as shown below:

Start tomcat service, you can view the CATALINA_OPTS *parameter* be set
Put the encrypted war archive in the directory: .\apache-tomcat\webapps
If the War archive can be parsed correctly, the webpage can run correctly.
Note: If you have configured the environment variable, the default system environment for Java execution will use the environment variable you have set, even you have assigned the *sjt* library location.
5.2.3 macOS system
- Create a new setenv.sh in the tomcat\bin directory, the full path environment variable can be set as follows:
CATALINA_OPTS="$CATALINA_OPTS -javaagent:/Users/sense/sjt/sjt_agent.jar
Start tomcat system service, you can view the parameter of CATALINA_OPTS set
Put the encrypted war archive in the directory: .\apache-tomcat\webapps
If the War archive can be parsed correctly, the webpage can run correctly.
Let's Start Your Software Protection and Licensing Journey!
Virbox will help you to protect your software copyright/IP Value and Create Revenue for you.